DDSKS bruger cookies

Vi bruger cookies til at integrere med vores videoudbyder og til at lave anonymiseret statistik over trafikken på vores hjemmeside.
Cookies er små tekstfiler, som kan bruges af websteder til at gøre en brugers oplevelse mere effektiv. Loven fastslår, at vi kan gemme cookies på din enhed, hvis de er strengt nødvendige for at sikre leveringen af den tjeneste, du udtrykkeligt har anmodet om at bruge. For alle andre typer cookies skal vi indhente dit samtykke.

Dette websted bruger forskellige typer af cookies. Nogle cookies sættes af tredjeparts tjenester, der vises på vores sider. Du kan til enhver tid ændre eller tilbagetrække dit samtykke fra Cookiedeklarationen.

Læs mereLuk

Statistik cookies hjælper webstedsejere med at forstå, hvordan de besøgende interagerer med hjemmesider ved at indsamle og rapportere oplysninger anonymt.
Sociale medier cookies tillader os at integrere med velkendte sociale mediers platforme. Formålet er en mikstur af marketing, statistik og interaktioner med 3. parts platformen.
Nødvendig for at afspille Vimeo videoer
Nødvendig for at afspille YouTube videoer
Præference cookies gør det muligt for en hjemmeside at huske oplysninger, der ændrer den måde hjemmesiden ser ud eller opfører sig på. F.eks. dit foretrukne sprog, eller den region, du befinder dig i.
Bruges til grafiske elementers tilstand

How to manage your profile

This guide shows you how to edit and manage your personal profile at ddsks.dk in 6 steps.

step 1 - log in to your account

To get started you need to log in to your account (jump to step 2 if you are already logged in). Go to ddsks.dk in a new tab or browser window and follow these instructions:

Click "Log in to website profile"
If this is you're first time logging in, or if you forgot your password, click 'REQUEST NEW PASSWORD', enter your school e-mail, and follow the instructions
When logged in, you can click your name to go to your profile.

Go to the bottom of the page and click 'Edit' to start editing your profile.

The 'EDIT'-button will ONLY be visible when logged in.

Now, you've entered the so-called "backend" of the website - this is where you create all the content on your profile.

step 2 - editing your profile

The backend has four different tools that you can manage:

  • Content 
  • Info
  • Sections
  • Related

In the following steps you will learn how to use each tool.

IMPORTANT: Whenever you've made a change - whether it's in Content, Info, Sections, or Related - you need to click 'Save' to complete them. When you click save, you will see how your changes appear to the public.

Remember to hit the 'Save'-button when you've made a change

step 3 - Content tool

The Content tool controls your name and your profile picture. Here's how to use it:

1. 'Title': Your name. 2. Image': Your profile picture.
Choose a crop selection and click 'Save'.

step 4 - info tool

The Info tool controls all the basic biographical information on your profile. It is completely up to you how much information you want to add. Just fill out whatever you think is relevant for the public to see and leave the rest blank.

You can use the info tool to fill out these categories

step 5 - section tool

The Section tool is definitely the most important and versatile tool. It allows you put many different types of content on your profile and manage it as you see fit.

With the Section tool you can manage these different forms of content:

  • image
  • images
  • text
  • collapsible
  • video
  • sound

Here's how to manage each one.

step 5.1. image

Use the 'Image'-tool if you want to post a single picture on your profile. See example below:


Choose the 'image'-section and click 'Add new section'
Choose a crop selection.
Click 'Full width' or 'Full height' if you want a wide or a tall format.
Add a description (optional). Click 'Create section' and 'Save'.
Example of a 'Full height' image
Example where neither 'Full width' or 'Full height' has been selected

step 5.2. images

Use 'images' if you want an image slideshow with a series of images.

This sections allows you to pick several photos.
Rearrange the order by clicking and dragging the images.
Example of an image slideshow.

step 5.3. text

Here are some of the options of the text-tool, which you can use to describe yourself, a project etc.:


Type in your text ...
... or use the 'Paste as plain text'-option to copy-paste some text
Make a header by marking some text, clicking 'Format' and choosing a heading
To deselect a heading, repeat the previous step.
You can also make a bullet list ...
... and insert an active link in the text
Here's the result.

step 5.4. collapsible

The collapsible-tool allows you to hide text under a drop-down heading:


Add a heading in the title-field and some text in the text-field
You can also add an image.
Example of a "closed" collapsible.
Example of an "open" collapsible.

step 5.5. video

With the video tool you can add videos to your profile from YouTube, Vimeo, and other video sources (it is, however, not possible to upload video files).

Add a title and/or description of the video.
Click 'Browse' to add your video-link.
Copy-paste a video-link. Click 'Next'.
Here's the result. You can now play the video from your profile.

step 5.6. sound

The sound-tool allows you to add a piece of music, a sound design, or the like from Soundcloud or other audio sources (it is, however, not possible to upload files).

Add a title and click 'Browse' to insert a sound-link.
Copy-paste a sound-link. Click 'Next'.
Here's the result. You can now play the recording from your profile.

step 6 - related tool

With the Related tool you can showcase all the school productions that you have participated in during your studies. You can only choose from school productions that are published on the website. Here's how it goes:

Type in a school production and it will appear in field.
When you're done, hit the 'Save'-button.
The productions will show up at the bottom of your profile.

end of tutorial!

This covers all the basic tools. Remember that you are always welcome to contact the communication unit if you would like some additional support. 


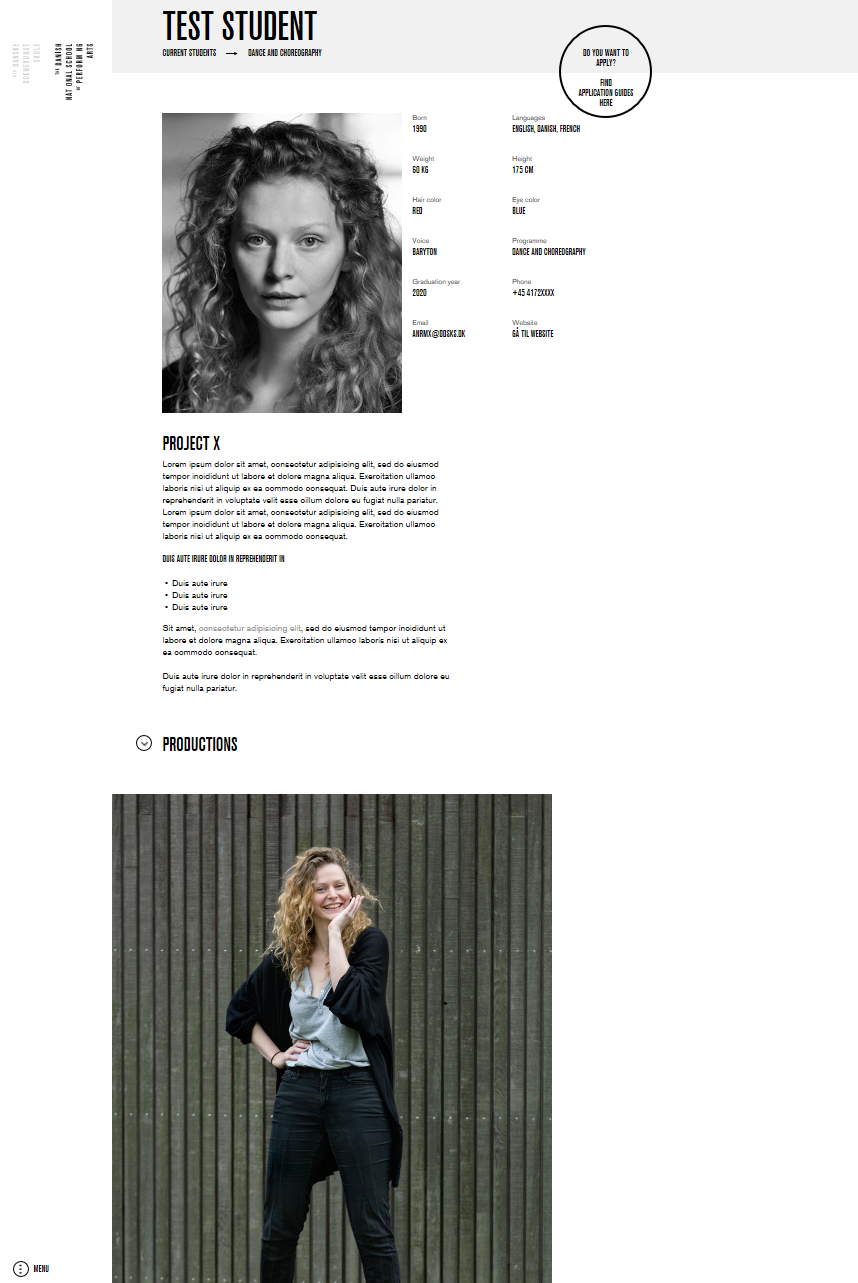
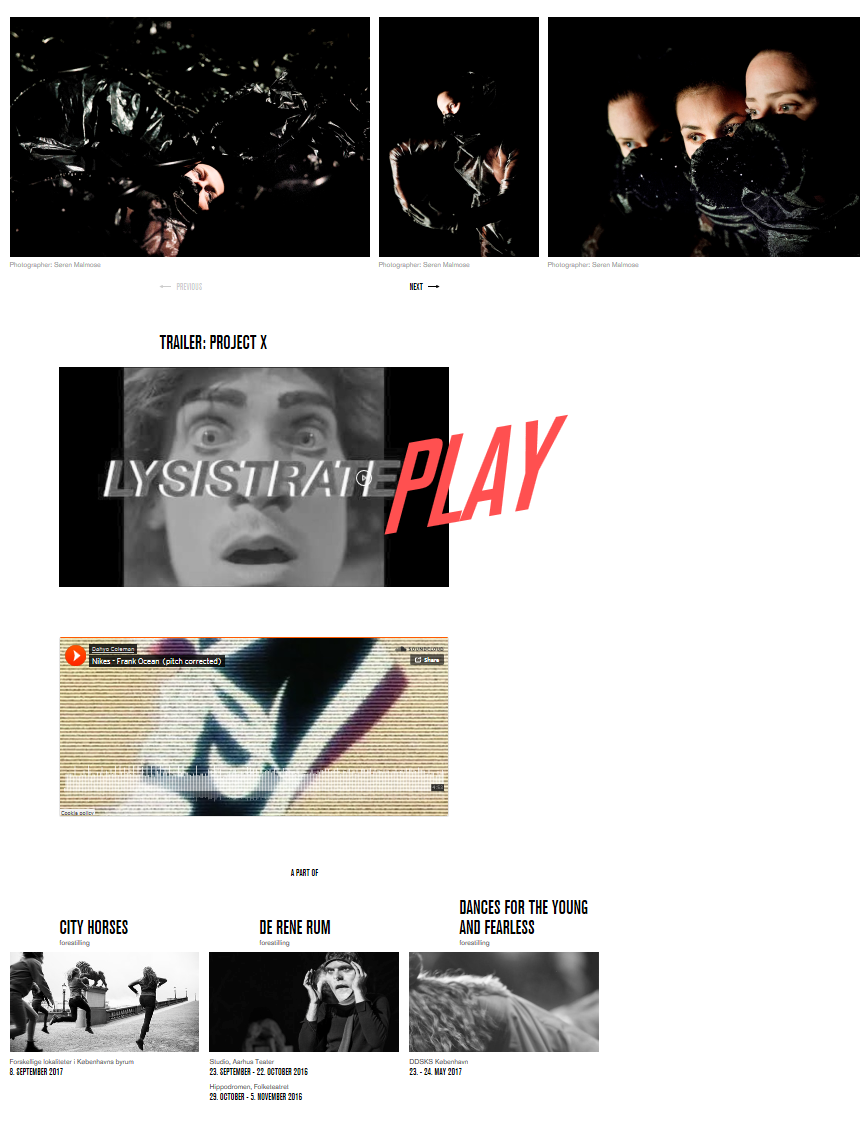
Below is an example of a student profile, where all the content types have been applied.

Need further inspiration? Check out some of your co-students' profiles.

Back to top